Scorched Brake Pads can compromise braking performance, even when the vehicle still stops normally. Their surfaces may appear glossy, dark brown, or nearly black. A sharp burnt smell may linger after downhill driving or repeated hard braking. You might also notice reduced pedal response, squealing, vibration, or longer stopping distances. These clues matter.
In workshop inspections, I check the pads, rotors, caliper movement, and brake hardware together. Heat rarely damages one component alone. A pad with a glassy friction surface may have lost effective grip. Blue marks on the rotor can suggest excessive heat, but color alone is not conclusive. A dark pad is not automatic proof of scorching. Dust, age, contamination, and uneven wear can create similar signs.
Do not rely on appearance alone.
This guide explains how to identify Scorched Brake Pads and replace them safely. It covers practical inspection points, likely causes, and warning signs that require professional attention. The process begins with a cool vehicle, stable support, and suitable protective equipment. Brake systems are safety-critical, so manufacturer specifications should guide every measurement and replacement decision.
Some diagnosis can remain uncertain without friction tests or service records. That is worth admitting. Replacing pads without correcting a sticking caliper or overheated rotor may repeat the problem. A qualified technician can verify the source, inspect related parts, and confirm proper braking performance afterward. Reliable repairs depend on evidence, not guesswork.
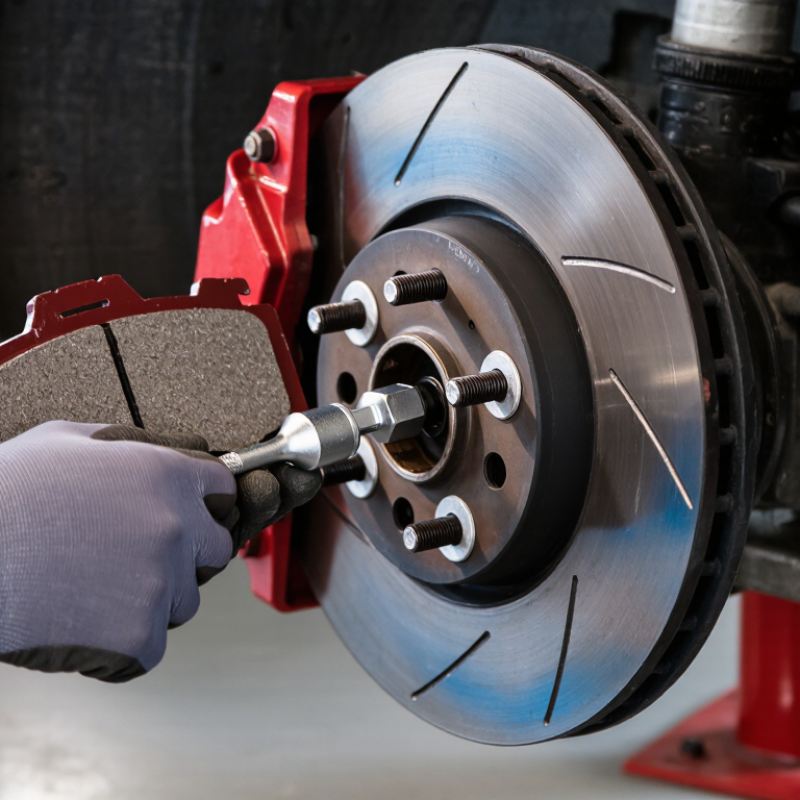
Scorched brake pads often reveal themselves through smell before sound. After a steep descent, you may notice a sharp, burnt odor near one wheel. Light smoke is a serious warning. Stop safely and let the brakes cool completely. Do not pour water over them. Sudden cooling can damage hot components.
Look through the wheel openings after cooling. Healthy friction material usually has a dull, even surface. Scorched pads may look glossy, cracked, or unusually dark. Deep grooves and uneven wear deserve attention. A blue or purple rotor can indicate excessive heat. Watch for a soft pedal, longer stopping distance, vibration, or the vehicle pulling sideways. These symptoms can have other causes, so visual inspection alone is not enough. I once mistook ordinary brake dust for heat damage, which delayed a proper check.
Replace scorched pads in axle pairs, not only on one side. Remove the wheel, inspect the rotor, and compare pad thickness across the axle. A sticking caliper or seized slide pin may have caused the overheating. Correct that fault before fitting new pads. Use suitable tools and follow the vehicle’s service procedure. After installation, press the pedal several times before moving. Perform gentle stops in a safe area, allowing cooling between applications. The pedal should feel firm. If smoke, burning odor, pulling, or poor braking returns, stop driving and arrange a professional inspection.
Brake pads are commonly about 10–12 mm thick when new. Around 5 mm, inspect them regularly; at approximately 3 mm or less, replacement is generally recommended, subject to the vehicle manufacturer’s specification. Scorching may also appear as a shiny glazed surface, blue or dark discoloration, cracks, burning odor, or reduced braking performance. A pad showing these signs should be inspected and replaced if damaged or contaminated.
Scorched brake pads rarely fail alone. Park the vehicle safely and let every component cool completely. Never touch a hot caliper or spray water on it. I have seen pads that looked only slightly dark but had lost their friction material. A sharp burnt smell is a warning, not a diagnosis.
Remove the wheel and inspect both pads on each side. Look for blackened surfaces, glossy glazing, crumbling edges, deep cracks, or uneven thickness. Measure the remaining material with a gauge. Compare the inner and outer pads. A large difference may indicate a sticking caliper, seized slide pin, or restricted brake hose. Inspect the rotor for blue patches, heat spots, ridges, or fine cracks. Check the caliper body, dust boots, mounting hardware, and nearby hose for melted rubber or fluid leakage. Brake fluid should not appear wet around the fittings.
Do not replace pads without finding the heat source. Spin the wheel after releasing the brake, if the vehicle design allows it. Resistance or grinding deserves professional testing. Replace scorched pads in axle pairs, and machine or replace damaged rotors according to measured specifications. Clean and lubricate approved contact points only. Never contaminate the friction surfaces. I once underestimated mild glazing; the stopping distance felt normal, but braking became inconsistent after several stops. That mistake reinforced the need for a controlled road test. Follow the vehicle’s service data, bed the new pads carefully, and stop immediately if smoke, pulling, or unusual pedal movement returns.
Confirming replacement needs more than noticing a burnt smell. Park on level ground, allow the brakes to cool, and inspect both pads on the same axle. Look for a glossy, glass-like friction surface, deep cracks, crumbling edges, or dark blue discoloration on the backing plate. These signs suggest excessive heat. A pad that appears merely dirty may still be serviceable, so visual judgment alone can mislead.
Measure the remaining friction material with a suitable gauge. Compare the measurement with the vehicle manufacturer’s minimum specification, not a guessed thickness. Replace the pads as an axle set if they are below the limit, badly glazed, cracked, or unevenly worn. Check the rotor for blue spots, heat cracks, or deep scoring at the same time. Do not ignore a strong burnt odor after a short drive.
Heat damage can return when a caliper binds, guide pins seize, or the parking brake fails to release fully. The cause matters as much as the pad. A practical check includes observing wheel temperature differences after gentle driving, without touching the metal directly. Be careful here. A quiet brake is not always a healthy brake. If the inspection is uncertain, have a qualified technician verify pad thickness, rotor condition, and caliper movement before fitting new parts.
Scorched brake pads may look black, cracked, or glazed like glass. Remove them only after the vehicle and brakes have cooled completely. Park on level ground, engage the parking brake, and place wheel chocks behind the tires. Wear safety glasses and gloves. A jack alone is never enough; support the vehicle with properly rated stands.
Remove the wheel and photograph the caliper assembly before loosening anything. This small step prevents confusion during reassembly. Keep the caliper supported with a strong wire or suitable support. Never let it hang from the brake hose. Remove the retaining pins, clips, or bolts carefully, then slide the damaged pads from their bracket. Do not force them with excessive leverage. Rust may have trapped them.
Brake dust can irritate your lungs, so avoid blowing it into the air. Use an approved brake cleaner and a controlled wipe instead. Inspect the rotor for deep grooves, blue heat marks, cracks, or uneven wear. Check whether the caliper moves smoothly and whether the pad bracket is heavily corroded. Replace pads as a complete axle set, not one side only. I have seen rushed repairs leave one old pad installed, causing uneven braking. That mistake is easy to make. If any part feels seized, damaged, or unclear, stop and seek qualified inspection before driving.
After removing scorched brake pads, inspect the rotor for blue patches, deep grooves, or heat cracks. I also check the caliper piston, slide pins, and pad clips for uneven wear. A shiny, burned pad surface often indicates glazing, not just normal use. Do not install new pads over a damaged rotor. That shortcut can create noise and poor braking. Clean the bracket with a suitable brake cleaner and remove rust from the contact points. Keep friction surfaces completely free from grease.
Fit the new pads in their correct positions, then retract the caliper piston slowly with the proper tool. On some vehicles, the piston must be turned while it is pushed inward. I once rushed this step and damaged a dust seal, so I now verify the service procedure first. Tighten the caliper bolts to the specified torque, not by guesswork. Before moving the vehicle, press the brake pedal several times until it feels firm. Then check for leaks and confirm the wheel turns without abnormal resistance.
Choose a quiet road for testing. Make several gentle stops from moderate speed, allowing the brakes to cool briefly between applications. Avoid hard braking during the initial bedding process. Listen for scraping, pulling, or repeated vibration. After the test, inspect the pad contact pattern and wheel temperature carefully. Uneven heat deserves another inspection.
| Stage | Inspection or Task | What to Look For | Recommended Action and Verification |
|---|---|---|---|
| 1. Confirm the Symptoms | Check for signs of overheating | A sharp burnt odor, smoke, reduced braking response, brake fade, unusual squealing, or one wheel that is much hotter than the others. | Stop driving if braking is weak, the vehicle pulls sharply, or smoke is visible. Allow the brakes to cool naturally before inspection; do not pour water on hot components. |
| 2. Secure the Vehicle | Prepare the work area | The vehicle is parked on a level surface with the parking brake applied, suitable wheel chocks installed, and the correct lifting points identified. | Use jack stands rated for the vehicle. Never work under a vehicle supported only by a jack. Wear eye protection and gloves. |
| 3. Inspect the Brake Pads | Examine pad thickness and friction material | Glossy or glass-like friction material, blackened areas, cracks, crumbling edges, uneven wear, or friction material separated from the backing plate. | Replace pads that are scorched, cracked, contaminated, or unevenly worn. Replace the pads on both sides of the same axle as a matched set. |
| 4. Measure Pad Wear | Measure the remaining friction material | Many vehicles require replacement near 3 mm of friction material, but the exact limit depends on the vehicle and manufacturer. | Use the vehicle service specification as the final authority. Replace pads before the friction material reaches the backing plate. |
| 5. Inspect the Rotor | Check the disc surface and thickness | Blue or purple heat marks, deep grooves, cracks, heat checking, heavy rust lips, or a rotor thickness below its stamped or specified minimum. | Measure rotor thickness at several points with a micrometer. Resurface only when permitted and when enough thickness will remain; replace cracked or undersized rotors. |
| 6. Find the Cause | Check for sticking or uneven operation | A seized caliper piston, restricted flexible hose, seized guide pin, damaged dust boot, blocked hardware, or a parking brake that does not release fully. | Correct the underlying fault before fitting new pads. Replacing pads alone may cause the new pads to overheat again. |
| 7. Remove the Old Pads | Disassemble the brake assembly | The caliper is supported without hanging from the brake hose, and pad clips, shims, and guide pins are identified for replacement or cleaning. | Do not disconnect the hydraulic hose unless required. Replace damaged clips and shims, and clean approved contact points without contaminating the friction surfaces. |
| 8. Prepare the Caliper | Retract the piston safely | The piston retracts smoothly using the correct tool. The brake-fluid reservoir has enough capacity for the returned fluid. | Follow the vehicle-specific piston procedure. On systems with an electronic parking brake, use the required service mode. Do not force or rotate a piston incorrectly. |
| 9. Install New Pads | Fit pads, hardware, and caliper | The pads move freely in the bracket, the friction surfaces are clean and dry, and the wear indicator is installed in the correct position. | Use the specified lubricant only on metal-to-metal contact points; keep grease off the friction material and rotor. Tighten fasteners to the vehicle service torque specification. |
| 10. Check Brake Fluid | Inspect the hydraulic fluid level | The fluid is between the reservoir marks after the pistons are fully reset, with no leaks around the caliper, hose, or bleeder screw. | Remove excess fluid if the reservoir is overfilled. Use only the fluid type specified for the vehicle and never reuse contaminated fluid. |
| 11. Restore Hydraulic Pressure | Pump the brake pedal | The pedal becomes firm after several slow applications and does not continue sinking while steady pressure is applied. | Do not drive until the pedal is firm. If it remains soft or sinks, inspect for trapped air, leaks, incorrect assembly, or a hydraulic fault. |
| 12. Perform a Static Test | Check wheel and component clearance | The wheel rotates without abnormal binding, the brake hose is not twisted, and all fasteners and clips are secure. | Install the wheel and tighten the wheel fasteners in the correct pattern and to the vehicle's specified torque. Verify that the parking brake releases fully. |
| 13. Conduct a Low-Speed Test | Test braking in a safe area | At walking speed, the vehicle stops smoothly without pulling, grinding, severe vibration, or warning lights. | Begin at low speed in a traffic-free area. Stop immediately and recheck the installation if the pedal feels soft or braking is abnormal. |
| 14. Bed In the Pads | Transfer an even friction layer | A typical procedure uses about 8–10 moderate stops from approximately 50 km/h to 15 km/h, with controlled cooling between stops. | Follow the pad manufacturer's or vehicle manufacturer's procedure when available. Avoid panic stops, holding the pedal while stationary, and prolonged braking during bedding. |
| 15. Final Road Test | Evaluate braking performance | The vehicle stops straight, the pedal remains firm, braking is consistent, and there is no persistent noise, vibration, burning odor, or wheel overheating. | After the test, inspect for leaks, loose hardware, uneven pad contact, and abnormal heat. Recheck wheel-fastener torque after the vehicle has cooled if required by the service procedure. |
| Important Note | When professional service is required | Cracked rotors, hydraulic leaks, repeated overheating, severe pulling, a sinking pedal, or an electronic brake-system warning. | Do not continue driving under these conditions. Have the brake system inspected by a qualified technician before returning the vehicle to normal use. |
A sharp burnt smell may appear near one wheel after heavy braking. Light smoke is serious.
Stop safely and let them cool completely. Do not pour water over hot brakes.
They may appear glossy, cracked, unusually dark, or deeply grooved. Healthy friction material usually looks dull and even.
No. Dirt can resemble heat damage. I once misread ordinary brake dust, so inspection matters.
Measure the friction material with a suitable gauge. Compare it with the vehicle’s minimum specification.
No. Replace pads in axle pairs. This helps maintain balanced braking on both sides.
Check the rotor for blue spots, cracks, or deep scoring. Inspect caliper movement and guide pins too.
Watch for smoke, burning odor, pulling, vibration, a soft pedal, or longer stopping distance. Stop driving if they return.
Press the pedal several times before moving. Perform gentle stops in a safe area, allowing cooling between applications.
Ask for help when pad thickness, rotor condition, or caliper movement remains uncertain. A quiet brake can still be unhealthy.
Scorched Brake Pads can reduce braking performance and create serious safety concerns. Common warning signs include a sharp burnt smell, smoke, unusual squealing, grinding noises, reduced stopping power, or a brake pedal that feels different. Begin by allowing the vehicle and brake components to cool completely, then inspect the pads, rotors, caliper, and nearby hardware for discoloration, cracks, glazing, uneven wear, or heat-related damage. If the friction material is thin, hardened, cracked, or badly burned, the pads should be replaced. Any damaged rotor or sticking caliper should also be addressed before fitting new parts.
To replace the pads safely, secure the vehicle on a stable surface, use appropriate supports, and follow the vehicle’s service instructions. Remove the wheel and caliper carefully without straining the brake hose, then take out the damaged pads and inspect the mounting points. Clean the contact areas, retract the piston correctly, and install compatible new pads with all required hardware. After reassembly, press the brake pedal until it feels firm, check for abnormal noises or leaks, and perform a cautious test drive. Gradually bed in the new pads according to proper procedures.

WEST INDUSTRY