Choosing a Crankshaft Oil Seal in 2026 requires more than matching a part number. Modern engines run hotter, tolerate tighter emissions controls, and often use stop-start systems. These conditions increase thermal cycling around the crankshaft nose and rear main housing. A small sealing error can leave a dark oil trail beneath the vehicle.
“Seal selection begins with the shaft surface, not the catalog page,” says Dr. Martin Keller, an automotive sealing engineer with more than twenty years of field experience. His point is easy to overlook. Measure the crankshaft diameter, inspect the wear groove, and confirm the housing depth before ordering. A seal may look identical on a workbench, yet its lip material, spring tension, and installation direction can differ.
Material matters. Fluoroelastomer, commonly called FKM, can withstand higher temperatures and many synthetic oils. Nitrile rubber may suit older engines and less demanding conditions. However, neither material is automatically better. Compatibility depends on oil chemistry, shaft speed, temperature, and exposure to dust or moisture. Check the manufacturer’s technical data.
Look closely.
This guide will compare seal materials, lip designs, dimensional standards, and installation methods. It will also explain how to evaluate aftermarket claims, packaging quality, and warranty support in 2026. Some choices remain uncertain, especially when an engine has been rebuilt or modified. I have seen catalog data miss important details. That is why physical inspection still matters.
The right Crankshaft Oil Seal should fit precisely, tolerate the operating environment, and install without forcing the lip over a damaged surface. Small details decide long-term reliability.
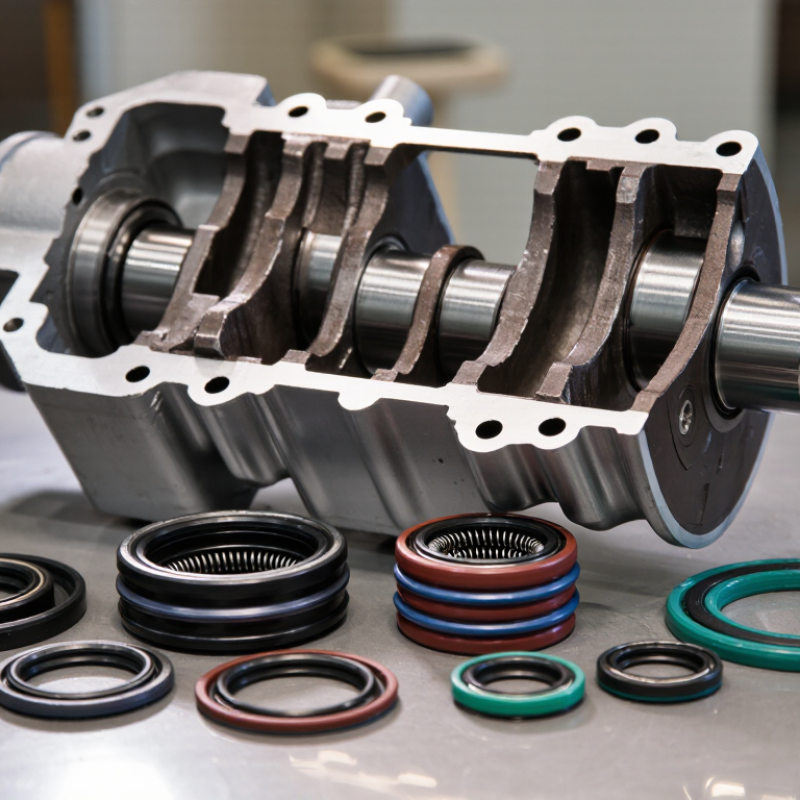
How to Choose a Crankshaft Oil Seal in 2026?
A crankshaft oil seal keeps engine oil inside the crankcase. It also blocks dust, water, and road grit from entering. This small ring works beside a rotating shaft, often under heat, pressure, and vibration. When its lip hardens, oil may appear behind the pulley or near the transmission housing. A tiny leak can become a serious maintenance issue.
SAE technical literature places engine mechanical friction losses near 10–15% of fuel energy under certain operating conditions. A poor seal cannot cause all that loss, but leakage can lower lubrication quality and increase contamination risk. ISO 6194 covers rotary shaft lip seal dimensions, materials, and performance principles. Use these standards when checking fit, shaft speed, temperature range, and fluid compatibility. Do not select by outside diameter alone. That shortcut often fails.
Tips: Measure the shaft surface carefully. Look for grooves, rust, or a polished wear track. Confirm the seal material matches the oil and operating temperature. A coated lip may help during installation, but excess grease can hide a damaged edge. Check the installation depth against service data. I would also inspect the breather system, because excessive crankcase pressure can push oil past a new seal. This step is easy to miss. It deserves a second look.
How to Choose a Crankshaft Oil Seal in 2026?
How to Match Seal Materials with Engine Conditions
Choosing a crankshaft oil seal starts with the engine environment, not the seal price. Check temperature, lubricant type, shaft speed, and dust exposure. Nitrile rubber suits many standard engines with moderate heat and conventional oils. It remains a practical choice for daily vehicles and simpler service conditions.
High-temperature engines may need fluoroelastomer material. It generally resists heat, oil additives, and chemical swelling better. Turbocharged engines deserve closer attention because heat can rise sharply near the rear seal. Polytetrafluoroethylene seals reduce friction, but their sealing lip can suffer from careless installation. Keep the lip clean and protect it from splines or sharp shaft edges.
Small details matter. Measure the crankshaft surface before ordering. A worn groove can defeat a new seal within weeks. Check the manufacturer’s dimensional specifications, even when the old seal appears identical. Fit is not enough. In workshop inspections, I have seen correct materials fail because crankcase pressure was excessive. Ventilation problems can push oil past an otherwise suitable seal. I also learned that material charts are only starting points. Real engine temperature, oil condition, installation quality, and shaft finish decide service life. When conditions are uncertain, record operating temperatures and inspect the removed seal for hardening, swelling, or lip wear before making the final selection.
Matching Seal Materials with Typical Continuous Engine Temperatures
The chart compares commonly used crankshaft oil-seal materials by their typical continuous temperature capability. NBR is suitable for standard engine oil service, while ACM and FKM provide greater heat resistance. PTFE supports the highest temperatures and low-friction applications, but seal design, shaft finish, pressure, fluid chemistry, and installation conditions must also be verified before selection.
Values are typical industry ranges for general-purpose compounds; actual limits vary by formulation, operating speed, pressure, and lubricant.
How to Choose a Crankshaft Oil Seal in 2026?
How to Select the Correct Seal Size and Design
Selecting the correct crankshaft oil seal starts with accurate measurements, not visual guessing. Measure the shaft diameter, housing bore, and available seal width with clean calipers. Record each value twice. Small errors matter.
Check the original seal’s direction, lip profile, and spring arrangement. A standard radial lip may suit a dry, moderate-speed crankshaft. A dust lip can help where road grit or clutch debris may enter. For higher temperatures, choose a seal material rated for the engine’s oil, heat, and rotation speed. Confirm the seal’s pressure limit, because crankcase pressure can force oil past a suitable-looking lip. The shaft surface also matters. Grooves, rust, or excessive polishing can quickly damage a new seal.
I once selected a seal by outer diameter alone. That choice was wrong. The lip sat against a worn track, and leakage returned within weeks. Inspect the shaft contact area with a light and fingernail. If a groove is present, measure its depth before choosing a repair sleeve or alternate lip position. Do not stretch the seal over sharp edges. Protect the lip with a clean sleeve, apply a thin oil film, and press it squarely into the housing. Uneven pressure can distort the metal case. After installation, verify crankcase ventilation and inspect for leaks after the first operating cycle. Keep the part number, measurements, material, and installation date in the service record.
Inspect the crankshaft surface where the sealing lip runs. Look for grooves, rust, burrs, or discoloration. A new seal cannot reliably correct a damaged journal. Also confirm the shaft’s rotation direction. Some sealing lips use a molded spiral pattern that supports oil control in one direction. Installing the wrong type can move oil toward the outside of the crankcase.
Review the crankcase design before selecting materials. Aluminum housings, high temperatures, splash lubrication, and crankcase pressure can affect seal performance. Compare the seal’s outside diameter with the housing bore, and check whether the casing needs a metal-covered or rubber-coated exterior. The fit should be firm without excessive installation force.
In field inspections, I have seen installers choose a seal from diameter alone. That shortcut often misses width, lip geometry, and dust protection. I once accepted a visually matching seal too quickly; its lip sat outside the worn track and leaked after testing. That mistake changed my inspection routine. Check the service manual, measure both components, and verify the sealing direction before installation. Apply only the recommended lubricant to the lip, keep the crankcase bore clean, and press the seal squarely into place.
When comparing crankshaft oil seals, begin with verified dimensions, not price. Measure the bore, shaft diameter, and seal width against the service manual. Quality also depends on the sealing material. Fluoroelastomer usually handles higher heat and many oils better than standard rubber. Check the operating temperature, oil type, shaft speed, and pressure before choosing. A strong garter spring helps maintain lip contact. However, excessive spring tension can increase friction and heat. Small details matter.
Service life depends on the seal and its environment. Inspect the crankshaft surface for grooves, rust, or uneven wear. A new seal may leak quickly on a damaged journal. I have seen clean installations fail because the shaft had a sharp wear track. A repair sleeve may be necessary. It is also wise to check crankcase ventilation, because excessive pressure can force oil past a good seal. No seal lasts forever.
Installation requirements should be compared before purchase. Use the correct driver or a flat installation tool, and keep the seal square to the housing. Lightly lubricate the sealing lip with clean engine oil. Do not hammer directly on the rubber. Confirm the lip faces the oil side, unless the manufacturer specifies otherwise. I once installed a seal at the wrong depth, assuming the old position was correct. That assumption caused trouble. Allow the seal to settle, then inspect for leaks after the engine reaches operating temperature.
Check temperature, lubricant type, shaft speed, dust exposure, and crankcase pressure. Seal price should not guide the decision. Small errors matter.
Nitrile rubber suits many engines with moderate heat and conventional oils. It works well for daily vehicles and simpler service conditions. Fit still matters.
Fluoroelastomer generally handles higher heat, oil additives, and chemical swelling better. Turbocharged engines may need it near hot rear sealing areas. Confirm actual temperatures first.
PTFE seals can reduce friction during operation. Their sealing lips may suffer from careless installation. Keep the lip clean and protect it from splines or sharp edges.
Measure the journal diameter, crankcase bore, and available seal width. Use calibrated tools. Visual similarity is not enough.
Grooves, rust, burrs, or discoloration can damage the sealing lip. A new seal may leak within weeks. Inspect the exact contact track.
Some sealing lips use molded spiral patterns for one rotation direction. The wrong type can move oil outside the crankcase. Check before pressing it in.
Clean the crankcase bore and apply only the recommended lubricant to the lip. Press the seal squarely with steady force. Do not force it.
Yes. Poor ventilation can push oil past a correctly selected seal. I have seen suitable materials fail this way. That possibility is easy to miss.
Record operating temperatures and examine the removed seal. Look for hardening, swelling, lip wear, and installation damage. Material charts are only a starting point.
Choosing the right Crankshaft Oil Seal is essential for preventing oil leaks, protecting engine components, and maintaining reliable performance. Start by understanding the seal’s role: it closes the gap around the crankshaft while allowing smooth rotation and helping keep oil inside the crankcase. Match the seal material to the engine’s operating conditions, including temperature, oil type, pressure, rotational speed, and exposure to dust or chemicals. A suitable material should resist wear, hardening, swelling, and deformation over time.
Accurate sizing is equally important. Confirm the inner diameter, outer diameter, width, sealing direction, and overall design against the engine specifications. Check whether the seal is compatible with the crankshaft surface, housing dimensions, keyways, grooves, flanges, and any dust-lip or pressure-control features. Finally, compare manufacturing quality, expected service life, inspection standards, and installation requirements. A dependable seal should have a smooth sealing edge, consistent dimensions, and clear fitting guidance, while installation should avoid damage, contamination, misalignment, or excessive force.

WEST INDUSTRY